Go panoramic
We revisit panoramic photography and explore situations where it can be valuable.
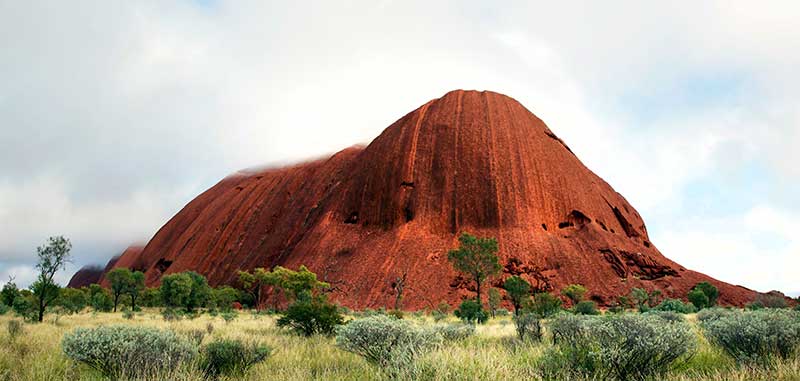
Panoramic images can be created by stitching two separately-captured frames together, as shown in this example.
There’s no formal definition of what makes a ‘panoramic’ photograph, although the consensus holds it must be at least three times as wide as it is high. Some people also insist that the horizontal field of view covered must be wider than 105 degrees.
The most common method for producing panoramas is to take a series of overlapping pictures covering a scene and stitch them together to form a single, elongated image. There are two main types of panoramic photography: cylindrical and spherical. We’ll look at each in turn.
Cylindrical Panoramas are the most popular type with stills photographers because they are the easiest to create with a normal camera. They can be produced from as few as two photos or more than ten. The angle covered need not necessarily cover the full 360 degrees; in fact it often falls far short.
The best capture method is to stand in one place and rotate your body as you hold the camera, taking a succession of stills that overlap between 30% and 50%. The overlap is necessary for the images to be accurately stitched together. The horizon must remain in the same position in all the shots.
Spherical Panoramas are mainly used for shooting 360-degree panoramas for Virtual Reality displays since the images will be viewed on either special viewers or used as ‘3D tours’ on a computer screen. If printed, they tend to be converted to a square spherical image using a special post-processing technique.
These shots are often taken with a special camera like the Ricoh Theta V or a catadioptric camera consisting of lenses and curved mirrors that reflect a 360 degree field of view into the lens for recording by the camera. The mirror shape and lens used are specifically chosen and arranged so that the camera maintains a single viewpoint. In recent years, add-on catadioptric lenses have become available for some smartphones.
Shooting tips
The following tips can improve your success rate when shooting images for stitching.
- While a tripod isn’t essential, mounting the camera on a tripod will ensure the horizons remain level although, if you want to keep them in the same place throughout the shot sequence, you will require a tripod with a panoramic head. Panoramic heads rotate around the central axis of the camera to minimise possible distortions that can occur in shots at each end of the sequence.
If you don’t have a panoramic head, use the spirit level on your tripod to ensure the shots stitch together with minimal distortion.
- Avoid wide-angle lenses. Standard and longer focal lengths will provide a more natural-looking perspective with less distortion.
- Shoot in manual mode to keep exposure parameters – aperture, shutter speed, white balance, ISO and lens focal length – the same throughout the sequence. Meter on the brightest part of the scene or use the camera’s multi-pattern metering mode. Then take a shot and check the histogram to see whether tones are correctly distributed (the highlights aren’t blown-out). Use exposure compensation if adjustments are required. Use manual focus and focus between a third and half-way into the scene.
- Smaller apertures – between f/8 and f/11 – will provide more depth of field for easier stitching. Panoramas are more impressive when everything in the scene is as sharp as possible.
- Keep the horizon centred if possible – or at least in the same position for all shots in the sequence. High- or low-angle shots will emphasise any inherent distortion resulting from the lens. (Some distortions may be corrected through the choice of the Layout method, as outlined in Stitching tips.)
- Try shooting with the camera in vertical (‘portrait’) orientation when you want to maximise the amount of image data available for stitching. This strategy works well in cities and for obtaining higher-resolution files in normal scenes with 3:2 and 4:3 aspect ratios. Capturing raw files gives you even more data to work with but requires more preparation of files before stitching.
- Avoid polarising filters because they can influence the tones in the sky, which will change at different angles to the sunlight. Graduated neutral density filters can be useful for controlling over-bright skies but you must be meticulous with the placement of the horizon.
- Work quickly when shooting in changing weather conditions. Clouds moving across the sky can influence exposure levels and result in blurring if they change position between shots. Avoid windy conditions if anything in the scene can be blown about.
[ Note: Most photo editing software has tools for stitching together separately-captured frames. For example in the latest version of Adobe Photoshop you simply use: File > Automate > Photomerge. ]
In-camera Panoramas
Back in March 2009, Sony introduced the Sweep Panorama mode in its Cyber-shot DSC-HX1 camera, the first to offer in-camera panoramic recording. This 9.1-megapixel camera could record a continuous burst of shots while the shutter button was held down as the photographer ‘swept’ the camera across the scene. It would then stitch them together to produce a single panoramic image.

In-camera panorama modes require the photographer to hold down the shutter button while the sequence of shots (usually in video format) is recorded. Stopping before the end of the sequence results in a black area where nothing was recorded, although the camera continued to capture frames.
The results were a bit hit-and-miss; if you lifted your finger before the recording stopped, the end of your panorama was recorded as a black rectangle. Also, because the frames were captured as videos, the resolution in the shorter dimension was restricted to the FHD format that was the highest available at the time. Vertical resolution was restricted to 1080 pixels for the Standard image size or 1920 pixels for the Wide size. Horizontal resolution was limited to 4912 pixels for vertical pans and 7152 pixels when panning horizontally.
Initially, in-camera panorama capture was lauded as an attractive feature of many new cameras. Today, while the capability continues in many consumer-level cameras and 4K video resolution makes it more worthwhile, it’s seldom (if ever) listed as a key capability.
Article by Margaret Brown – see Margaret’s photography pocket guides
Excerpt from Photo Review Issue 82
Subscribe to Photo Review magazine
Also see: Ten Tips for Better Landscape Photography
And: Landscape Photography pocket guide
