Time-lapse and interval recording
How to create a video that shows processes that normally wouldn’t be visible in real time, like flowers opening or stars moving across the sky.
These days just about every camera above the most basic level includes a time-lapse/interval recording shooting mode. This setting records video frames at very long intervals in order to permit speeded-up playback in which time seems to be moving much faster than it would in real life.
Time-lapse recordings are commonly used to show slow processes that normally wouldn’t be visible in real time, such as flowers opening, the growth and/or decay of plants, the evolution of a construction project, the passage of clouds across the sky, people or traffic moving in an urban environment or the movements of the sun or stars across the sky.
An evolution of the technique is used for stop-motion animation, which combines a sequence of stills with small differences between individually photographed frames that when played back appear to show the subjects in motion.

You can have a lot of fun with time-lapse shooting. This set of frames comes from a 30-minute time-lapse sequence shot while on vacation with friends as the sun was setting. You can see the dwindling light in the differences between the early and late exposures. Having no tripod, we steadied the camera by placing it on a brass sundial plaque on the viewing platform at the summit. Played back at 25 fps, the resulting video shows an amusing movie of people scrambling back and forth along the ridge.
Frame rates in time-lapse movie recordings are highly variable and, in most modern cameras, controlled by an intervalometer. Most camera menus allow you to set individual values for the following parameters:
– Start and end times for the recording;
– The intervals between frames, which can range from a rate close to the normal frame rate (around 25 fps) to only one frame per hour, day, week, or longer, depending on subject;
– The number of frames in the sequence.
In most cases, the camera should be able to meter exposure parameters and adjust settings accordingly to maintain consistent exposure levels across the sequence. However, it’s worth noting some cameras will have problems producing smooth adjustments if long shot-to-shot intervals (such as an hour) are used when transitioning across widely-changing brightness levels.
Day-to-night transitions are among the most demanding scenes in time-lapse photography. In remote areas with low light pollution, the difference in brightness between night and day can be more than a million times, which is beyond the capabilities of most cameras’ sensors.
Automatic exposure systems can sometimes handle these transitions by adjusting the camera’s aperture, shutter speed and ISO settings. Abrupt transitions can also be minimised by reducing the intervals between frames to reduce the differences in brightness between frames.
For longer intervals, time-lapse can be combined with high dynamic range (HDR) imaging, where the camera records three frames at separate exposure values and combines them into a single frame, which is used in the resulting video. Software solutions that allow the recording to be controlled remotely from a computer (or tablet) are also used by some professionals.
Menu settings
Always begin a time-lapse session with a fully-charged camera battery and enough memory capacity to support your recording. Use your camera’s menu system to select the interval timer shooting mode.
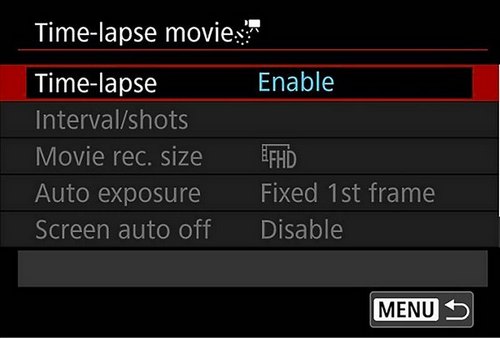
Enabling the time-lapse mode lets you record with the intervalometer in the camera.
The next step is to set up the shooting parameters, starting with the resolution you want for the recording. If you plan to extract still frames, choose the highest resolution available. If the recording will only be played back as a movie on a normal computer or TV screen, selecting FHD will give you scope for longer recording times, which can be useful if the camera’s memory capacity is relatively small.
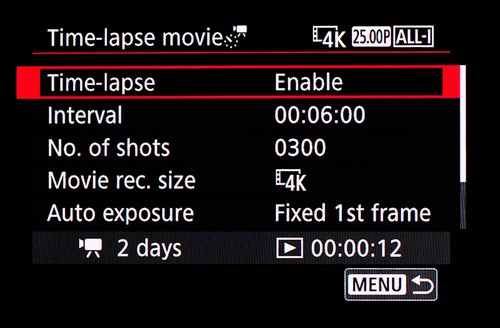
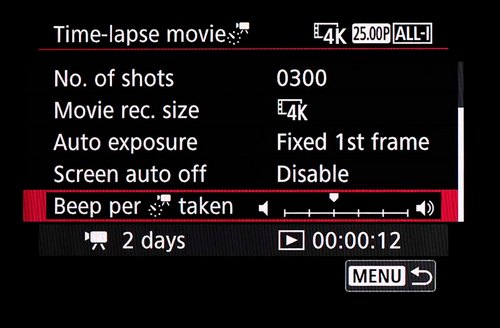
Enabling time-lapse recording will display the options available for setting the shot-to-shot interval, total number of shots, resolution for the movie, exposure settings and duration of recording.
The next step is to determine how long you want the recording to run for and the frequency of the exposures in the sequence. The interval between shots and the total number of shots are set in the top two lines on the screenshot shown here. Below them you can see how much time is needed to complete the recording (1) and how long the recorded time-lapse movie will play back (2).
Most cameras provide additional settings for configuring how the recording settings should change with changing exposure levels and whether the screen should turn off while the sequence is being recorded to conserve battery power.
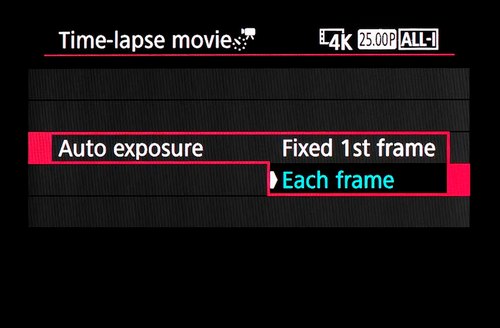
This screenshot shows typical exposure choices in an entry-level interchangeable-lens camera.
Selecting Fixed 1st frame in the Auto exposure menu will measure the exposure levels at the start of the sequence and apply them to all subsequent exposures. This can work well when you want to show changing brightness levels in a scene, such as the transition from just before sunset to a little after, as shown in the illustrations.
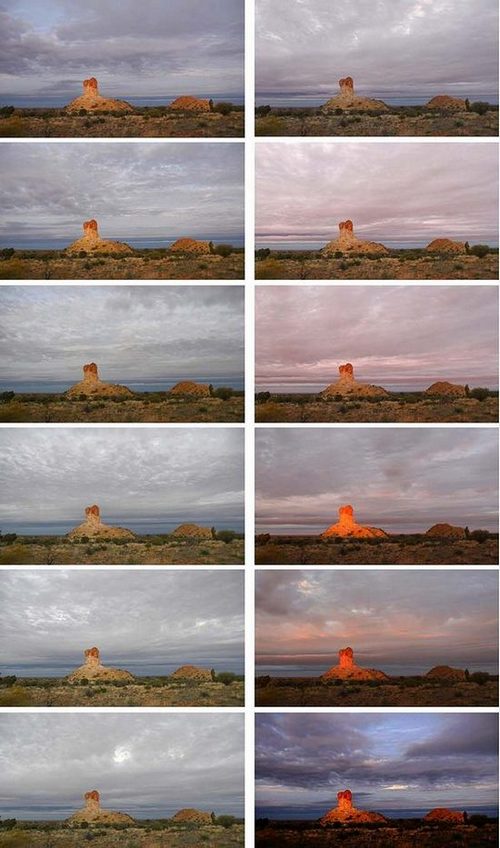
This sequence of images taken over a period of ten minutes near sunset shows how light can change with the time of day and the coverage and positions of clouds.
However, if the range of brightness levels changes substantially over time, you’ll end up with over- and under-exposures at the extremes of the scene brightness range. In such situations, it’s better to select Each frame, which sets the camera to measure exposure levels before each frame is captured.
When the Screen auto off setting is set to Disable, the screen will remain active (showing the image of the scene) for approximately half an hour after the shooting started. This consumes battery power. Selecting Enable will turn the screen off approximately 10 seconds after shooting starts, allowing you to record longer sequences.
Setting the camera to beep each time a shot is taken lets you keep track of your recording.
Sometimes it’s useful to know when each frame is recorded. Selecting Enable in the Beep as img taken page causes the camera to beep each time a frame is recorded. Some power is used producing the beep so if you’re concerned about running out of power, it’s better to Disable this function.
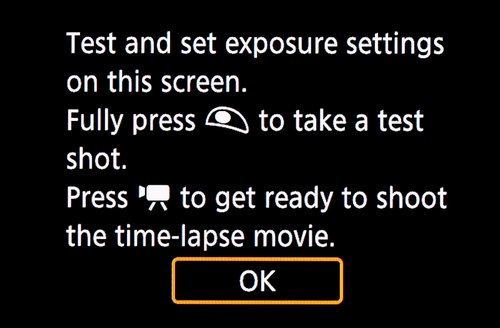
Some cameras allow you to take a test shot to check exposures before committing to a time-lapse sequence. This is a useful feature for preventing unsatisfactory results.
Technical details
Think about how long the camera will be running – and how long you want the finished video to be. In most cases, the video will be played back at 25 fps, which means 25 frames will be equivalent to each second of playback.
Use this formula to find out how many images your time-lapse requires: (playback frame rate) x (desired clip duration, in seconds) = (total number of frames needed). As an example, for playing back 20 seconds of recording at 25 fps, you must record 25 x 20 = 500 frames in the sequence.
If you know how long you’ll be recording – based on your camera’s battery capacity or the duration of the event – you can take that time in minutes, multiply by 60 to get the number of total seconds, and then divide the result by the number of frames you plan to record. This will tell you what interval to set between shots.
Suppose your camera’s battery can provide enough power for two hours of time-lapse recording (120 minutes or 7200 seconds). If you want playback to last for 50 seconds at 25 fps, the camera must record 500 frames at intervals of roughly 14 seconds.
Match the frame intervals to the subject you’re recording. Fast-moving scenes like clouds skidding across the sky or people and traffic in the city require intervals of two to three seconds, while recordings of the night sky range from half a minute to an hour.
If you’re using a DSLR, cover the viewfinder eyepiece. Stray light leaking through could change the exposure between frames and produce flickering when the footage is played back.
Useful equipment
A tripod is essential for most time-lapse photography, because the camera must be kept perfectly still in most situations. There are exceptions; some stunning time-lapse sequences can be created by moving the camera during the shot.
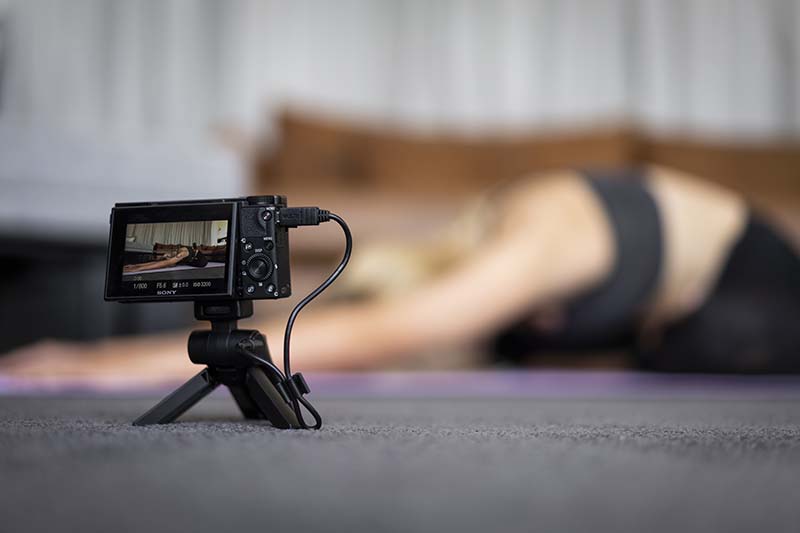
Mounting your camera on a tripod ensures you can record a steady sequence of frames when creating time-lapse movies of processes like yoga sequences. (Source: Sony.)
When shooting in bright conditions you may need a neutral-density (ND) filter to cut back the amount of light reaching the sensor and prevent over-exposures. ND filters can also make it easier to use wide apertures if you want selective focusing in close-ups of flowers opening or fruit decaying.
Make sure your memory cards have high enough storage capacities to handle that data. Fast cards aren’t necessary for shot-to-shot intervals longer than about a second.
Check that weather conditions are suitable by looking at the Bureau of Meteorology’s rain radars. Look up the sunset and sunrise times and the position and phase of the moon when shooting star trails at night (see link at the end of this chapter).
You’ll get the best star trail sequences when there’s no moon in the sky as its brightness will overwhelm the stars. For time-lapse recordings of lunar eclipses you’ll need to adjust exposures to deal with huge changes in brightness levels.

These two photographs taken just after the start of a lunar eclipse and just after totality ended show the huge (60 times) difference in brightness range that occurs as the moon enters and leaves the obscurity zone.
Viewing time-lapse movies
Most cameras compile the sequence of shots into a movie, usually at 4K resolution but sometimes lower. Recordings can be played back on normal TV sets and computer screens.
Time-lapse movies are always silent so you may want to add a soundtrack – either narrative or background music or a combination of both. Time-lapse footage can be imported into normal editing software and even basic editors should allow you to add titles and credits as well as graphics to complete your production.
Useful links
Sun and moon phase times
Time-lapse video tips
This article by Margaret Brown is an excerpt from Videography pocket guide
Pocket guide Partner: Camera House