How To Use PuTTY SSH With cPanel®
cPanel & WHM’s intuitive web interfaces make it easy to manage servers and web hosting accounts. However, it’s occasionally useful to work on a server’s command line instead. The PuTTY SSH (Secure Shell) client allows you to log in to a server’s command line interface shell over an encrypted connection so that sensitive data isn’t exposed on the internet.
Once logged in, you can access the full suite of Linux command-line tools, interact with the cPanel & WHM API utilities, and create scripts that automate admin tasks. In this article, we’ll show you how to log in via SSH with PuTTY SSH, including two ways to authenticate with the server: a username/password combination and the more secure SSH keys.
What is the PuTTY SSH Client?
The PuTTY SSH client is a collection of GUI tools for managing and interacting with SSH sessions. Its main components are an SSH session manager and a terminal emulator. It also includes a set of helper tools, including an SSH key generator, which we’ll look at later in this article.
PuTTY is compatible with several operating systems, although it is primarily used on Microsoft Windows® because, until recently, Windows did not have a built-in SSH client.
Accessing cPanel Servers via SSH with PuTTY
To follow the walkthrough in this article, you will need to install PuTTY on your local computer. You also need access to a server or hosting account that allows SSH connections, as well as your cPanel account’s username and password.
Logging in to your hosting account with a username and password is straightforward. Once PuTTY is installed, open it from the Start menu.
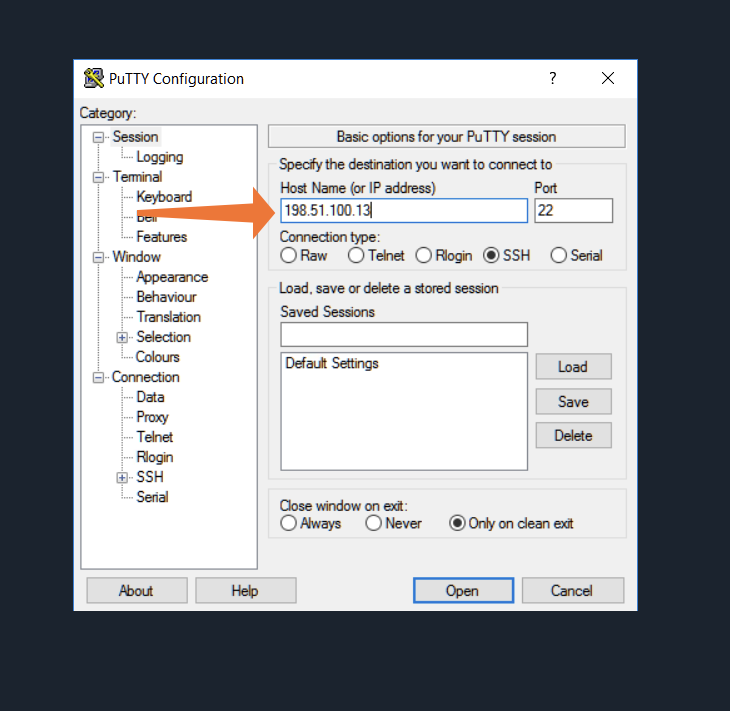
The interface looks complicated, but at the moment we’re only interested in the Hostname and Port fields. In Hostname, enter your server’s domain name or IP address. You can find the IP address in the General Information section of the cPanel sidebar.
Unless you or your hosting provider changed the server’s SSH port, leave the Port entry on the default 22.
Click Open at the bottom of the window and PuTTY will attempt to start an encrypted SSH session on your server. If this is the first time you’ve connected, Windows may pop up a dialog asking for permission. You’re safe to proceed if you entered the host details correctly.
Once the connection is established, PuTTY opens its terminal emulator with a username prompt. Enter your cPanel username, press enter, and then provide your password.
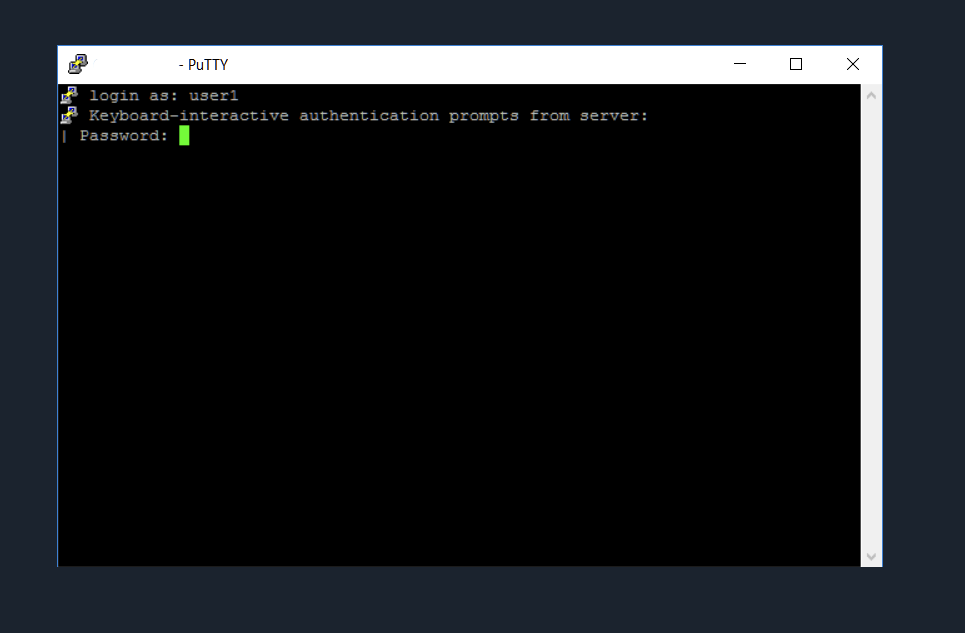
All being well, the server will authenticate you and you’ll be given a command prompt. If you’re happy to log in with your username and password, that’s all you need to know to access cPanel via PuTTY.
Read on if you’d like to learn a more secure way to authenticate.
How To Connect to Your cPanel Server With PuTTY SSH and SSH Keys
SSH keys are an authentication mechanism based on public-key cryptography. The user generates a key pair with a public key and a private key. As the names suggest, you keep the private key secret and upload the public key to the server. The keys are mathematically intertwined so a cryptographic algorithm built into the SSH server can use the public key to verify ownership of the private key.
There are several benefits to this approach. SSH keys aren’t vulnerable to brute-force and dictionary attacks; if you keep the private key secret, there is no chance of anyone guessing it. SSH keys can also use a passphrase so that they are even more secure. Unlike a password, the private key is never sent over the internet, so it can’t be snatched as it traverses the network.
SSH keys aren’t perfect: if someone has access to the machine you store the private key on, they can steal it. But they are much more secure than the passwords people usually choose.
Generating SSH Keys with PuTTY
When you installed PuTTY, you also installed the PuTTY Key Generator. Launch it from the Windows menu. It’s another complicated-looking interface, but as before we’re only interested in a couple of the features.
If you want to use a passphrase with your keys—and you should—enter one in the Key passphrase and Confirm passphrase fields.
Click the Generate button and PuTTY will ask you to wiggle your mouse around. This seems peculiar, but the mouse’s movement provides random data the software needs to generate keys. When you’re done wiggling, the public key is displayed in the top text field.
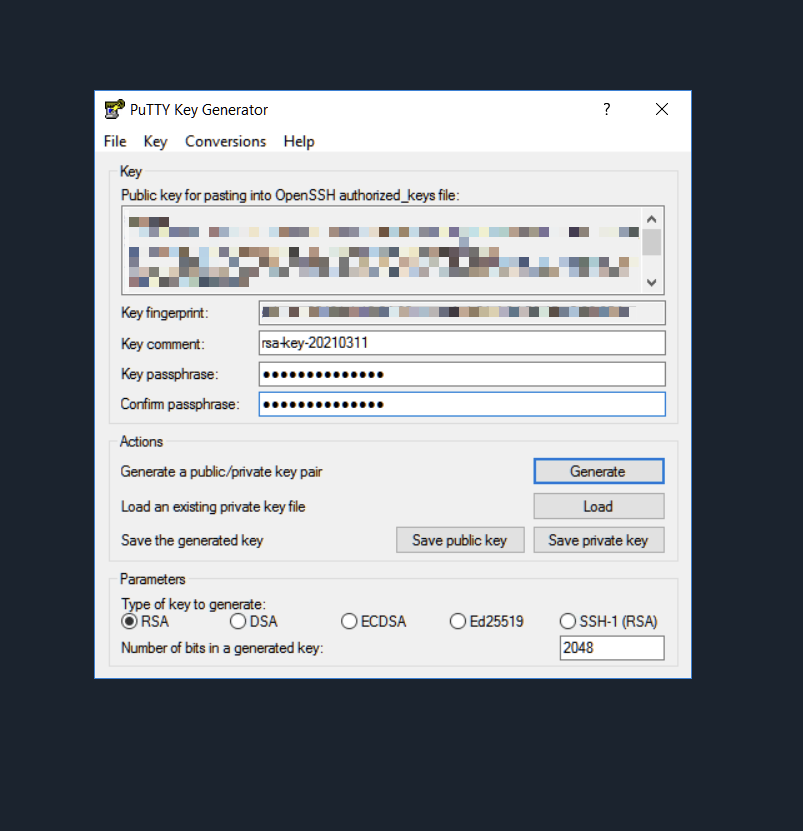
Before we get to the public key, click the Save Private Key button to save the resulting .ppk file with a meaningful name.
Uploading the Public Key to Your Server
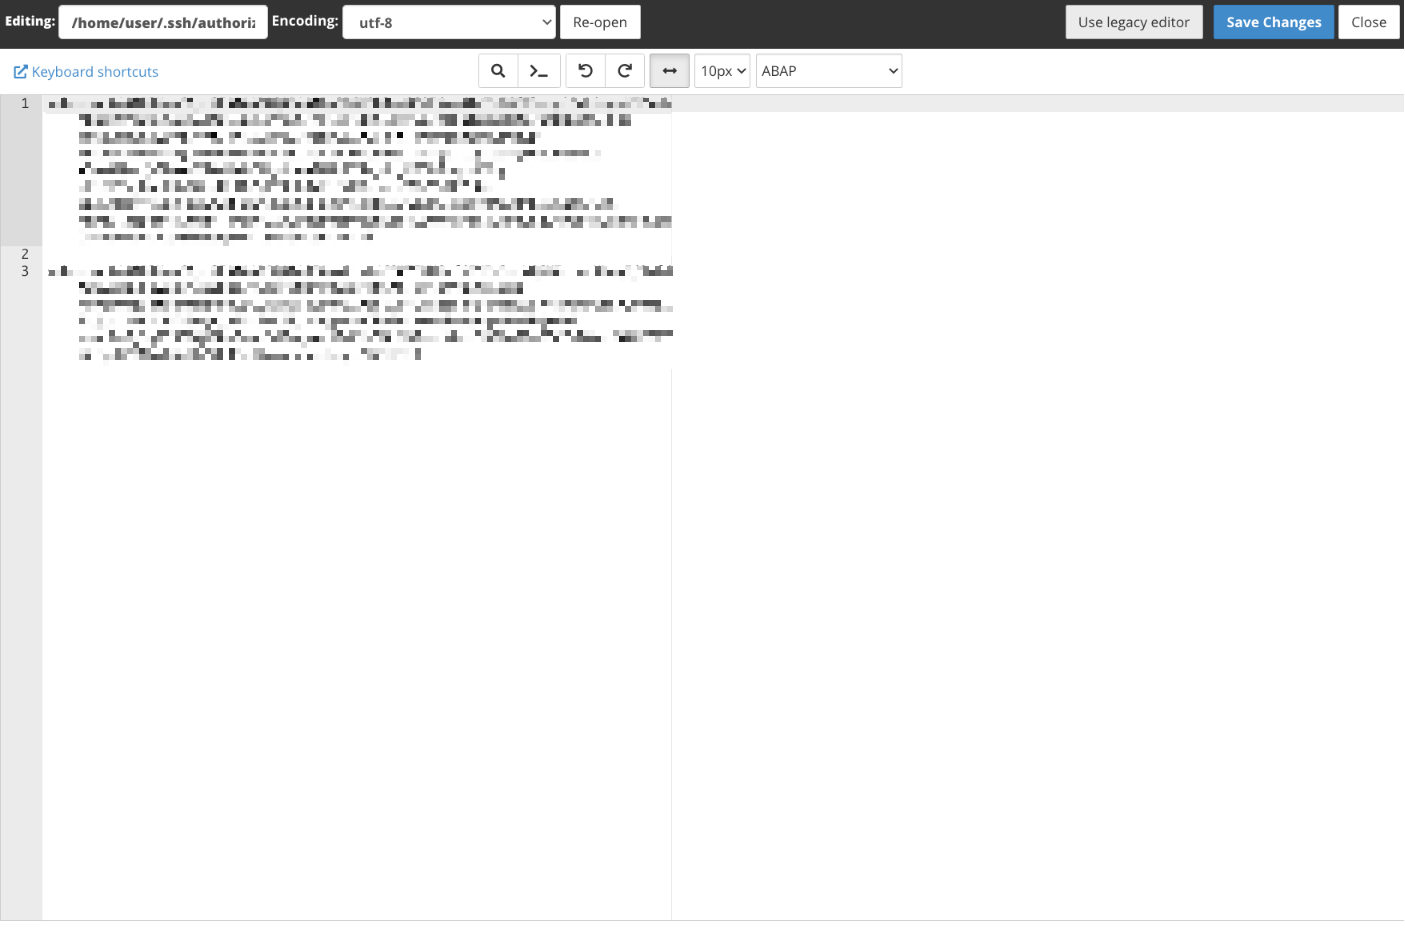
The public key must be made available to the SSH server, and we’re going to do that by adding it to your user account’s authorized_keys file.
Log in to your cPanel account and open the File Manager, which you’ll find in the Files section of the main page menu. Browse to the .ssh folder, select the authorized_keys file, and click the Edit button in the toolbar.
Copy the public key from the PuTTY Key Generator and paste it at the bottom of this file; leave an empty line between existing keys and the new one. Click the Save Changes button.
Both keys are where they need to be, so we can now use them to authenticate with the server. But first, we need to tell PuTTY where to find the private key.
Open PuTTY’s main session interface:
- Enter your server’s domain name or IP address.
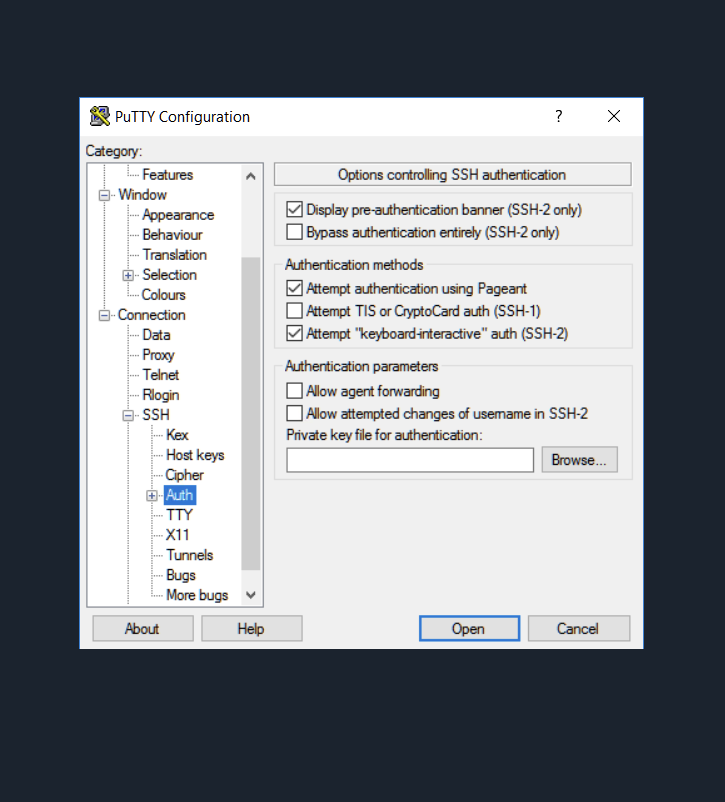
- In the left-hand sidebar, expand the Connection item, then the SSH item, and click Auth.
- Click the Browse button and select the .ppk file you saved earlier.
- Click the Open button at the bottom of the window.
PuTTY will now attempt to use the private key to authenticate with the server. It opens the terminal emulator and asks for your username and the passphrase associated with the key (if you used one). If you supply the correct credentials, you’ll be logged in to the server’s command line.
Finally, you can save the session details in the main interface so that you don’t have to specify a private key and domain name every time you log in.
PuTTY SSH is a useful tool that became popular when Windows lacked a built-in SSH client. It’s still the most powerful and feature-rich client available for Windows, but Windows 10 now includes a native SSH client. If you don’t need all the bells and whistles that accompany PuTTY, you might want to take the built-in client for a spin.
As always, if you have any feedback or comments, please let us know. We are here to help in the best ways we can. You’ll find us on Discord, the cPanel forums, and Reddit. Be sure to also follow us on Facebook, Instagram, and Twitter.