WP CLI: Install and Manage WordPress® on the Command Line
WordPress is incredibly easy to use with its intuitive graphical interface but it’s not ideal for server administrators and hosting providers who manage hundreds of sites. WP-CLI (WordPress Command Line Interface) is a powerful tool that can control every aspect of WordPress from the command line.
When you’re tasked with updating or installing a plugin, managing multiple WordPress sites with the command line and scripting is more efficient. In this article, we’ll show you how to install WP-CLI and highlight some of its most useful features, including how to install, update, and manage WordPress core, plugins, and themes on the command line.
How to Install WP-CLI
WP-CLI is a self-contained PHP app that can be installed both by server administrators and ordinary cPanel users.
- Server administrators can make WP-CLI available to all of the server’s users.
- cPanel users can install it in their home directory or a WordPress site’s directory to control their sites.
To install and use WP-CLI, you will need access to your server’s command line. Administrators with root access can log in with SSH. cPanel users can log in with SSH if it’s available or cPanel’s built-in Terminal.

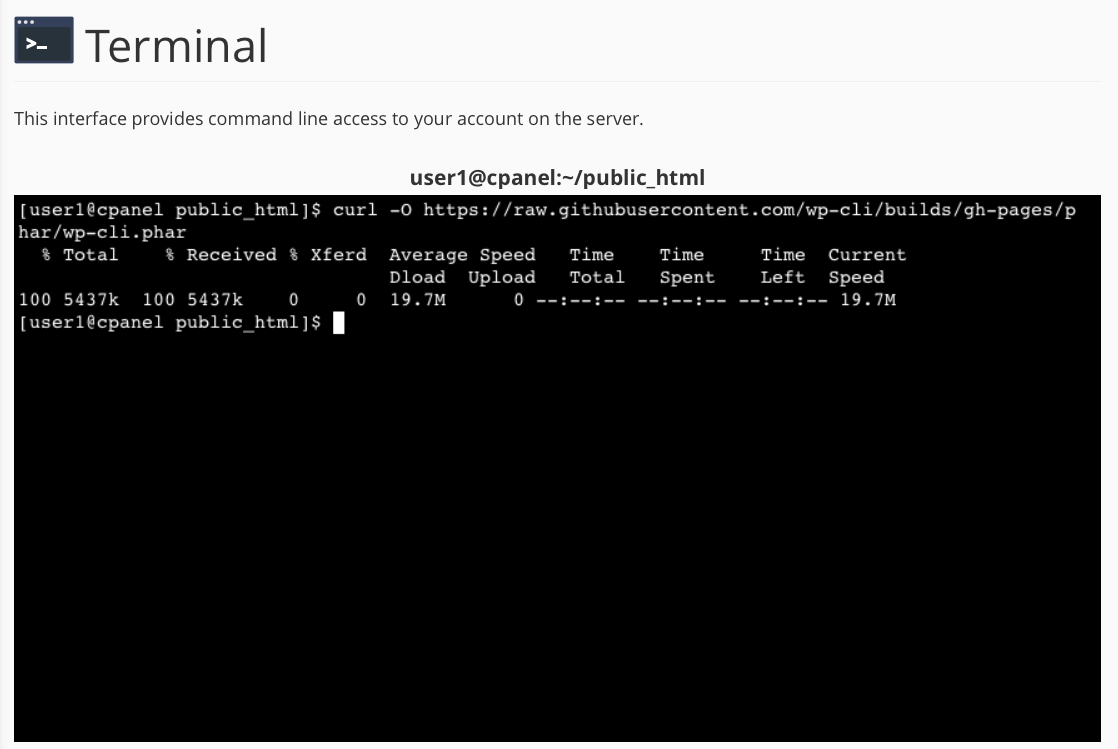
First, we need to download WP-CLI to the server with:
curl -O https://raw.githubusercontent.com/wp-cli/builds/gh-pages/phar/wp-cli.phar
Before we can run it, we need to provide execute permissions with:
chmod +x wp-cli.pharYou can learn more about chmod and file permissions in How to Assign Permissions to Files and Folders in cPanel.
Setting Up WP-CLI as the Root User
To allow every user to run WP-CLI, we have to move it to a directory in the system’s PATH.
mv wp-cli.phar /usr/local/bin/wpThis:
- Moves the file to “/usr/local/bin.”
- Renames it to “wp” for convenience, although you can also choose another meaningful filename.
All users should be able to run WP-CLI from as “wp.”
Setting Up WP-CLI as a cPanel User
cPanel users without root access can’t move files into a directory in PATH, but they can run it from their home folder or in a WordPress site’s directory.
To run it from your home directory, you can tell WP-CLI which WordPress site to control with the “–path” option. For example:
./wp-cli.phar config list – path=/home/user/public_html/If you move WP-CLI into the WordPress site’s directory, you don’t have to supply a location with “–path,” but you will need to specify the directory that contains the executable, using “./“ for the current directory.
/home/user/public_html/wp-cli.phar config listTo make it easier to use, you can create an alias, a command-line shortcut :
alias wp='~/wp-cli.phar’The shell will replace “wp” with “~/wp-cli.phar”, allowing you to enter “wp” rather than the full path to the executable.
You can make the alias permanent with:
echo "alias wp='~/wp-cli.phar'" >> .bashrcWe’re adding the alias command to your account’s .bashrc configuration file so that it runs whenever you log in.
How WP-CLI Commands Work
WP-CLI commands are composed of a primary command followed by subcommands for controlling particular aspects of a WordPress site.
For example:
wp help Here “help” is a command, which has subcommands such as:
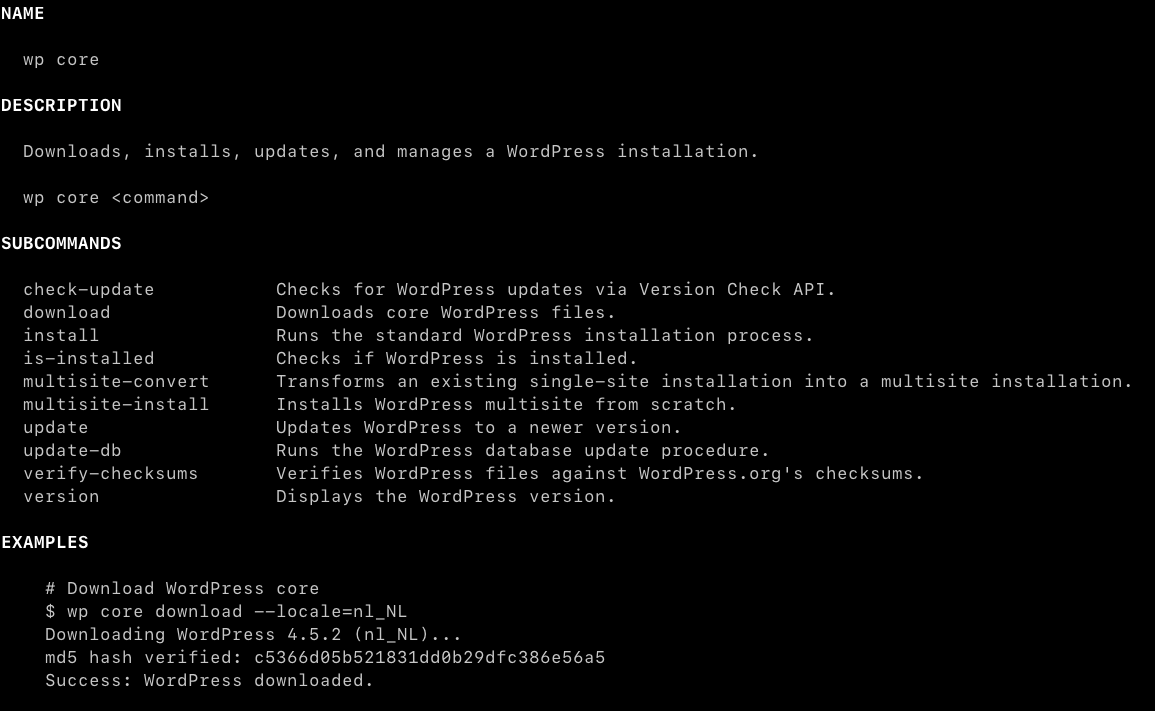
wp help coreThis prints help information for “core” management features. The tool has an excellent built-in help and documentation system. If you’re unsure which commands you can run or what they do, help should be your first recourse.

4 Incredibly Useful WP-CLI Commands
There are over 40 commands and hundreds of subcommands. You can read the full list in the documentation, but we’d like to highlight a few of the most useful.
- Reading and Writing Config Files
- Changing WordPress User Passwords
- Installing WordPress core, themes, and plugins
- Back-up and Optimize the WordPress Database
Reading and Writing WordPress’s Configuration
The config command can read and write WordPress’s configuration, which is stored in the wp-config.php file.
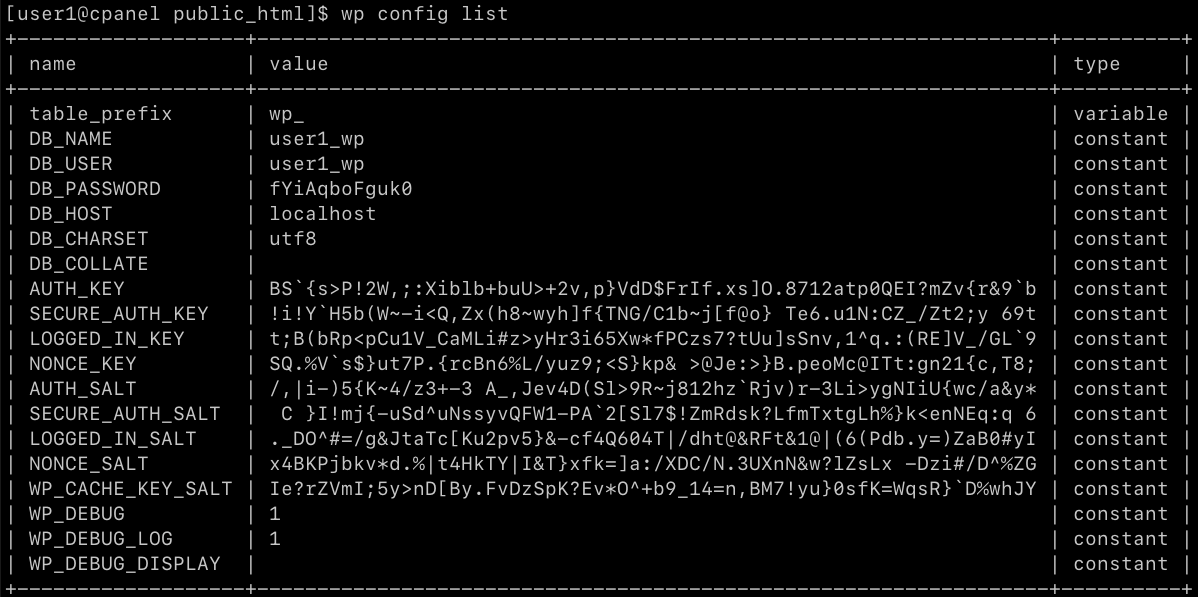
To see the configuration variables in a site’s wp-config.php file:
wp config list
To edit individual configuration variables such as the database name:
wp config set DB_NAME new_nameTo generate a new wp-config.php file with pre-configured values:
wp config create – dbname=user2_wp – dbuser=user2_wp – dbpass=new_passwordChanging WordPress User Passwords
In our recent article, Fixing WordPress Login Errors With cPanel, we explored how to change user passwords by editing the database. Here’s a faster way to replace lost and forgotten WordPress passwords.
wp user update USERNAME – user_pass="new_password"Although this method is faster, it is not as secure because the user’s plaintext password is stored in your shell history. You can delete the shell history entries by using the up arrow to select the command and pressing Ctrl-U to delete it.
Installing WordPress Core, Themes, and Plugins
One of the most useful aspects of controlling WordPress from the command line is the ability to install everything from a plugin to a full WordPress site.
Let’s start with a plugin:
wp plugin install hello-dolly – activateTo install without activating, omit the “–activate” option. To find the correct name for a plugin, open its page in the WordPress plugin catalog and copy the URL slug. In the example, we used the Hello Dolly plugin and copied the URL slug from its web page: https://wordpress.org/plugins/hello-dolly/.
To install a theme:
wp theme install twentytwenty – activateYou can also “uninstall,” “delete,” and “update” plugins and themes. The update feature is particularly useful on sites with many plugins:
To update all of a site’s plugins at the same time:
wp plugin update – allFinally, to install a new WordPress site in seconds:
wp core install – url=example.com – title="A New Site" – admin_user=frank – admin_password=astrongpassword – admin_email=frank@example.comRunning this on the command line stores the plaintext admin password in the shell history, but you can delete it as described in the previous section.
Back-Up and Optimize The WordPress Database
As we explained in How to Back Up and Restore MySQL® Databases in cPanel, it’s straightforward to dump your site’s MySQL database in the cPanel interface. However, if you prefer to back up from the terminal, use:
wp db export – add-drop-tableThe “–add-drop-table” option ensures that data is correctly replaced when restoring the backup. Export creates an SQL file with a filename based on the date and database name. To specify a different filename, add it to the end of the command:
wp db export – add-drop-table database-backup.sqlTo restore the database, import the SQL file with:
wp db import database-backup.sqlImporting is a destructive action. It will irretrievably delete any data that was added to the database after the backup was made.
Finally, you can optimize or repair the database. Optimizing reorganizes the way data is stored to speed up reading and writing:
wp db optimize Repair attempts to fix damaged database tables. It is often worth trying when you suspect database corruption or in a White Screen of Death situation where the WordPress interface is not working.
wp db repairFast and Efficient WordPress Multisite Management with WP-CLI
WP-CLI is an essential tool for anyone who hosts and manages large numbers of WordPress sites. It can substantially reduce the time and effort needed to carry out regular maintenance tasks.
In this article, we focused on running commands manually, but all the commands discussed and many more can be used in scripts to automate complex workflows. WP-CLI can also be combined with cron to schedule WordPress management tasks. We explained how to automate web hosting tasks with cron in How to Configure a Cron Job.
If using the WP-CLI still seems a bit daunting, cPanel has added the most used WP-CLI commands to WordPress Toolkit for cPanel in Version 92. Launching a site, managing plugins and themes, and more, are all just a click away. Discover all the features of WordPress Toolkit.
As always, if you have any feedback or comments, please let us know. We are here to help in the best ways we can. You’ll find us on Discord, the cPanel forums, and Reddit.


